Schema-Based Testing Setup  
This article walks through the minimum steps required to go from a fresh account to your first Schema-Based Testing run. For advanced configuration, see Docker reference; for the catalog of detection rules, see Strategies.
Prerequisites
Before you create a test policy, make sure the following is in place:
-
Security Testing subscription — contact sales@wallarm.com to activate the Security Testing subscription plan for your account. Once the subscription is assigned, the Schema-Based entry appears in the left menu under Security Testing.
-
Authentication token — Wallarm Cloud uses a token to authorize data exchange between the Docker container and your account. You can let Schema-Based Testing create the token automatically the first time you copy a Docker command, or create it in advance under Settings → API Tokens with Token usage set to
Schema-Based Testing agent. -
IP allowlist (if applicable) — when the target API is protected by Wallarm or other security tools, allowlist the IP from which the Docker command will run. Otherwise, attack requests are blocked and vulnerabilities go undetected.
-
Postman collection — a working Postman collection (and optionally a Postman environment file) that describes how to call the target API. The collection must contain functional tests for the API endpoints, the location of the target application, all required environment variables, and credentials to authenticate. Verify it runs end-to-end, for example:
If the collection cannot run on its own, Schema-Based Testing cannot run either.
Step 1. Create a test policy
A test policy bundles the Postman collection, environment file(s), and selected scan modes into a single reusable configuration.
-
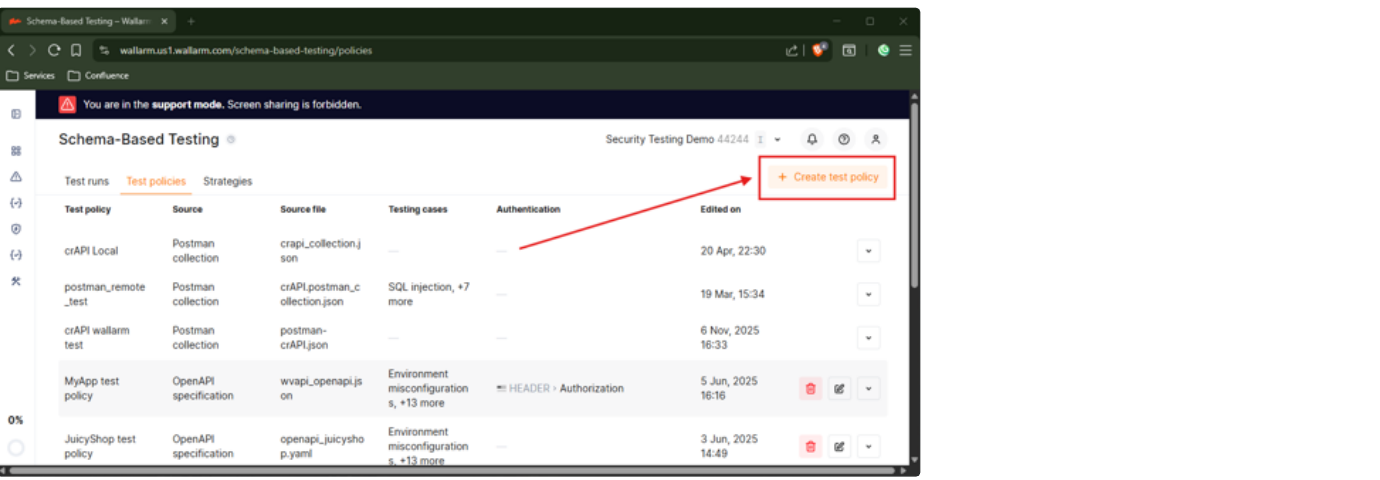
Go to Wallarm Console → Security Testing → Schema-Based → Test policies and click Create test policy.
-
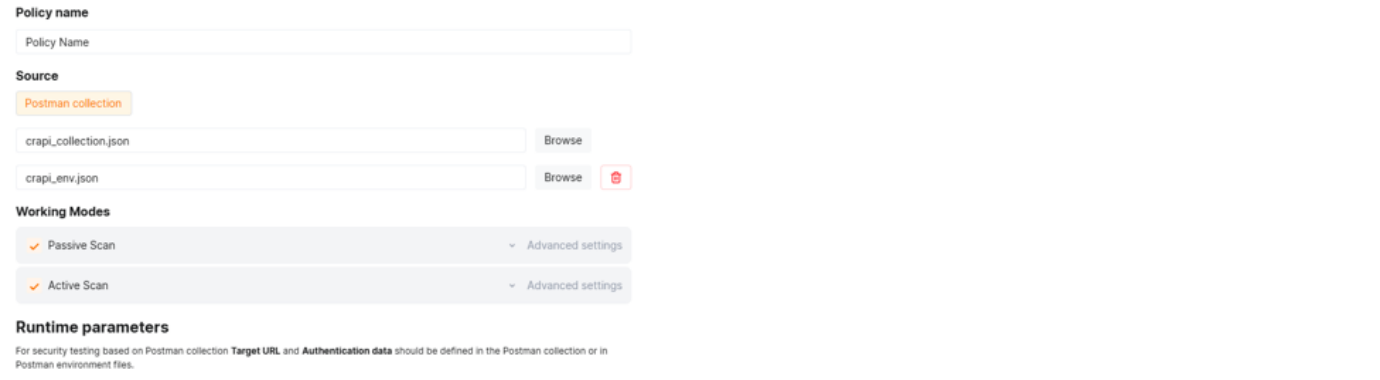
Provide a Policy name.
-
Set Source to Postman collection and attach the Postman collection file.
-
Optionally, attach Postman environment file(s). Attaching two environment files runs testing twice with different variable values (for example, different credentials) and then compares results.
-
Under Working Modes, enable Active Scan, Passive Scan, or both. For each enabled mode, click Advanced settings to choose which strategies participate. By default, all strategies of the corresponding type are enabled — you can leave the defaults or narrow the selection.
-
Save the policy.
Target URL and authentication
For Postman-based policies, the Target URL and authentication parameters are taken from the Postman collection or environment file(s). They are not configured in the policy and cannot be redefined per Docker run.
Step 2. Copy the Docker command
-
On the Test policies tab, click the policy you just created. The policy's Docker command is displayed.
-
Copy the command. You can adjust the Docker log level, log format, and success-criteria threshold right above the command.

Step 3. Run the scan
Run the copied Docker command on a machine that has network connectivity:
-
To the API being tested (
Target URLfrom the Postman collection or environment). -
To Wallarm Cloud (US, EU, or ME):
Wallarm Cloud IP addresses
To provide Wallarm Cloud access to your system, you may need a list of its public IP addresses:
A typical run prints pre-flight checks, the workflow progress, and a final security-issues summary. For CI/CD integration, environment-variable reference, report generation, mTLS, and override patterns, see Docker reference.
Step 4. See results
When the run finishes, the Test runs tab shows it with status, request count, credits consumed, and the number of detected security issues. Open the run to inspect health checks, the pipeline stages, and the per-strategy hypotheses with their verdicts. Confirmed findings are also promoted to Security Issues with Discovered by = Schema-Based Testing.
See Exploring test run results for a walkthrough.