Infrastructure Discovery Setup  
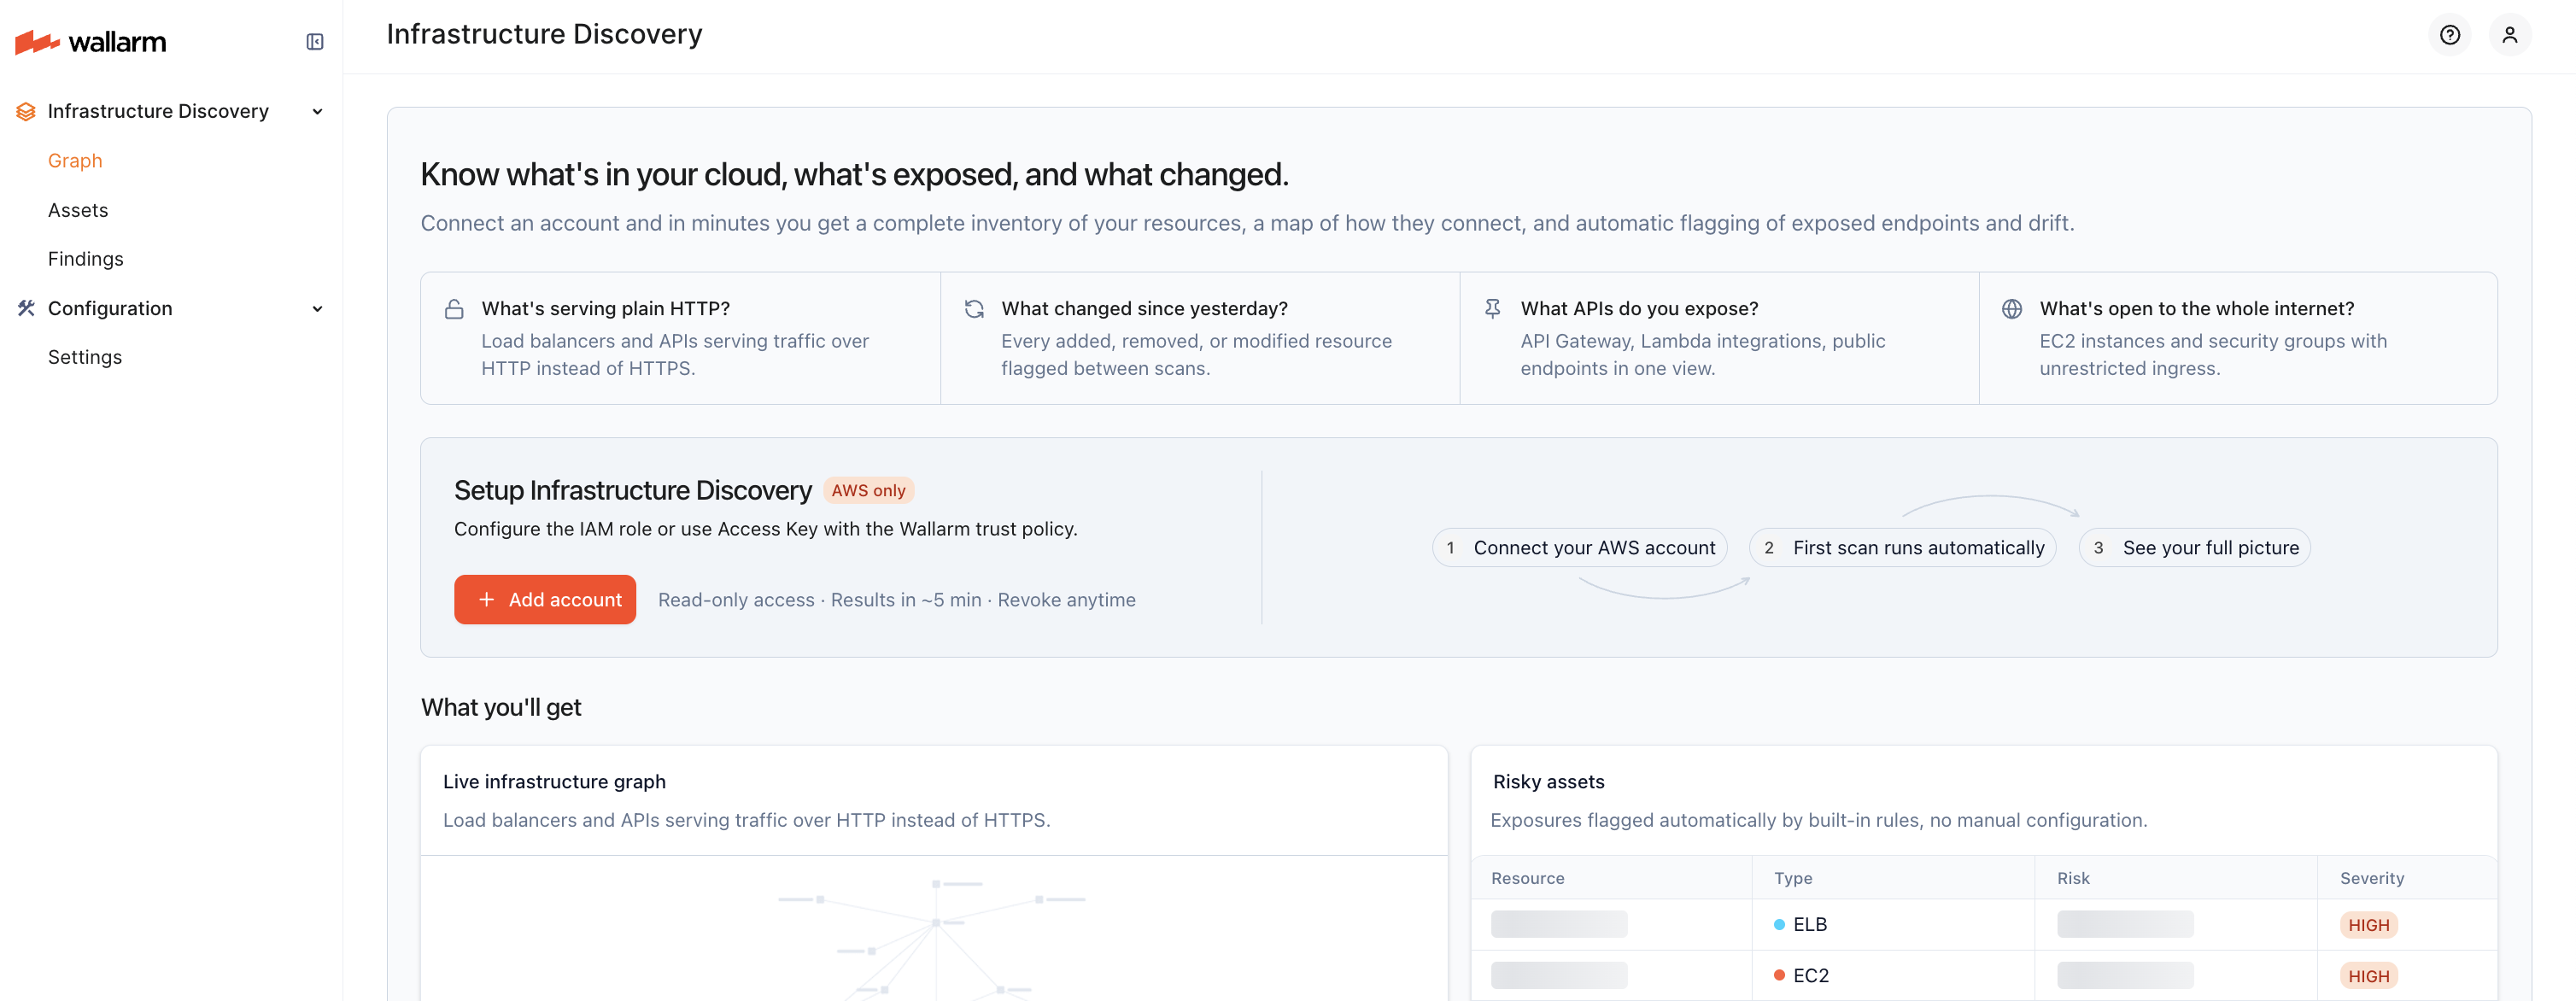
This article describes how to get access to Wallarm's Infrastructure Discovery, connect your AWS accounts, and configure scanning.
Requirements
-
Infrastructure running in AWS
-
An AWS account with permissions to create a CloudFormation stack (for the IAM Role method) or an IAM access key
-
Network access from your AWS account to the Wallarm Cloud (no inbound firewall rules required — all communication is outbound from Wallarm)
Setup flow
1. Get access
Self-service sign-up runs through AWS Marketplace:
-
Open the Wallarm Infrastructure Discovery listing on AWS Marketplace, choose a subscription plan, and click Subscribe.
-
After the subscription is processed, AWS shows a Set up your account button on the listing. Click it to start registration with Wallarm.
-
Fill in the Wallarm registration form with your email and account details, then submit.
Wallarm creates the account and activates the Infrastructure Discovery subscription on it automatically — no extra step is required.
-
Check your inbox. Wallarm sends a confirmation email with your Wallarm Console credentials and next-step instructions.
-
Sign in to Wallarm Console, connect your AWS accounts, and wait for the first scan to complete — typically a few minutes depending on account size.
Wallarm Cloud region
The AWS Marketplace sign-up flow provisions a US Wallarm Cloud account by default, and your scan data is stored there. Infrastructure Discovery also runs on the EU and ME Wallarm Cloud instances — if you need an EU or ME account, contact sales@wallarm.com instead of subscribing through AWS Marketplace.
Existing Wallarm API Security customers who run into issues with the flow above can contact sales@wallarm.com instead.
2. Connect an AWS account
To connect an AWS account, click Add account in the Infrastructure Discovery section of Wallarm Console.
Authentication type
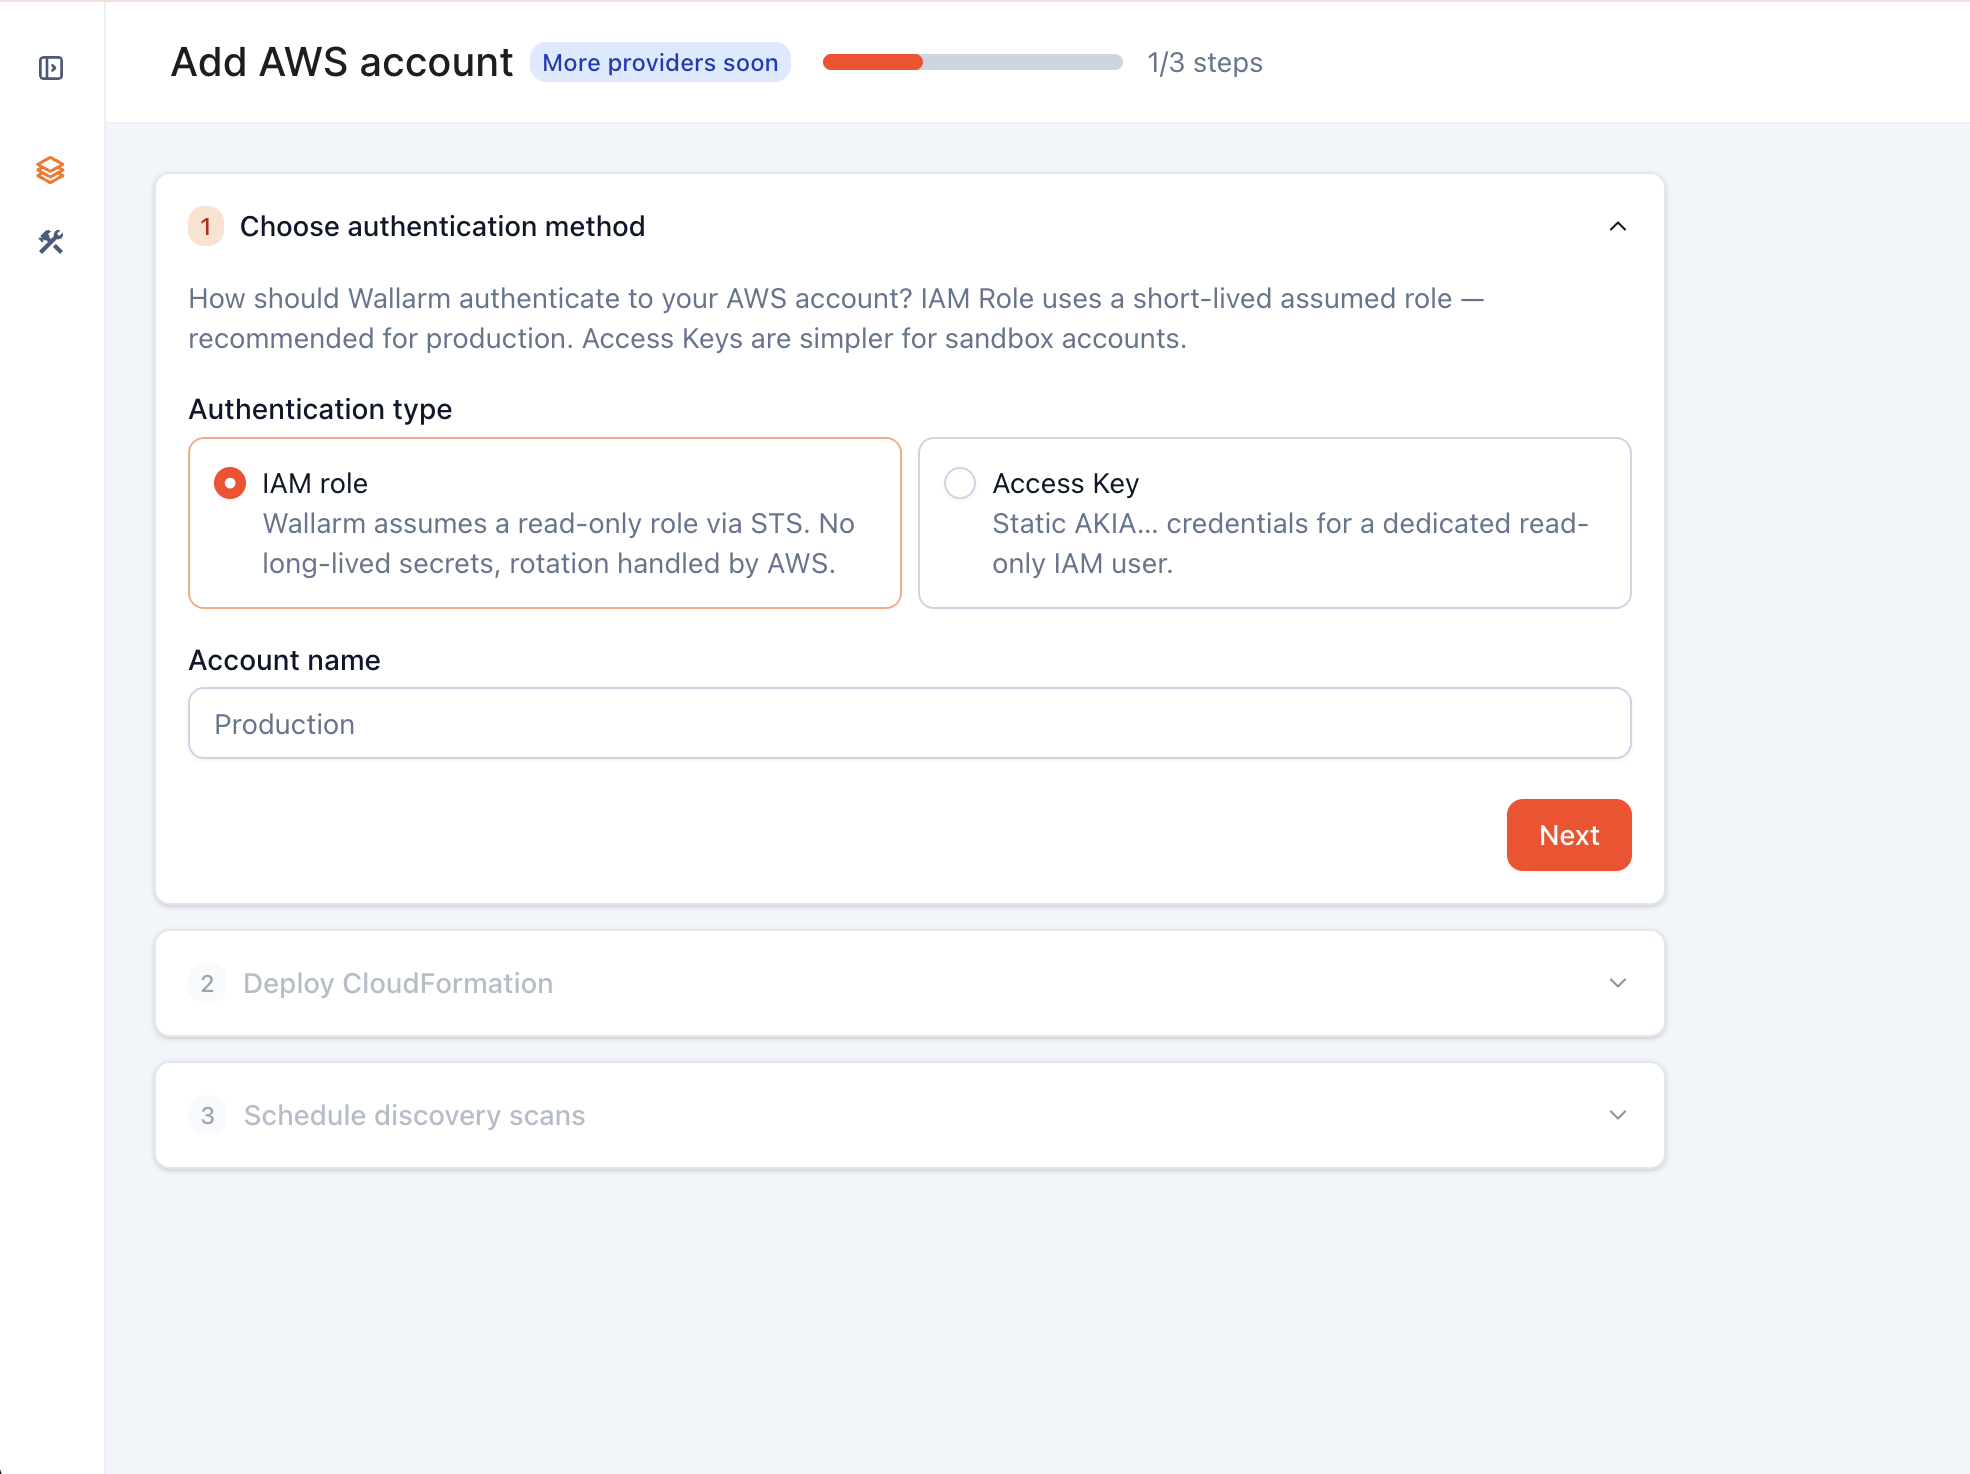
The first step of the Add AWS account wizard offers two authentication types:
| Method | How it works | Best for |
|---|---|---|
| IAM Role (recommended) | A Wallarm CloudFormation template deploys a read-only cross-account role; Infrastructure Discovery assumes it on demand with short-lived STS credentials. | Production environments |
| Access Key | You provide an Access Key ID and Secret Access Key for an IAM user in your account. The key is long-lived and stored encrypted in Wallarm. Rotation is your responsibility. | Evaluation, sandboxes, or environments where role assumption is not available |
Both methods use the same read-only permissions and produce the same inventory.
Required AWS permissions
The following read-only IAM policy covers all supported resource types. With the IAM Role method, the CloudFormation template applies it automatically. With the Access Key method, you need to attach this policy to the IAM user manually.
{
    "Version": "2012-10-17",
    "Statement": [
        {
            "Sid": "WallarmInfraDiscoveryReadOnly",
            "Effect": "Allow",
            "Action": [
                "ec2:Describe*",
                "elasticloadbalancing:Describe*",
                "eks:List*",
                "eks:Describe*",
                "lambda:List*",
                "lambda:GetFunction",
                "lambda:GetPolicy",
                "apigateway:GET",
                "route53:List*",
                "route53:Get*",
                "iam:List*",
                "iam:Get*",
                "bedrock:List*",
                "bedrock:Get*",
                "cloudtrail:List*",
                "cloudtrail:Get*",
                "cloudtrail:Describe*",
                "cloudtrail:LookupEvents",
                "securityhub:GetFindings",
                "securityhub:ListFindingAggregators",
                "sts:GetCallerIdentity"
            ],
            "Resource": "*"
        }
    ]
}
For multi-account setup via AWS Organizations, add the following permission to the management account role:
{
    "Sid": "WallarmInfraDiscoveryOrganizations",
    "Effect": "Allow",
    "Action": [
        "organizations:ListAccounts"
    ],
    "Resource": "*"
}
No data-plane access
Infrastructure Discovery does not request data-plane permissions. It will never access your data: no s3:GetObject, no rds:*Data, no log-reading, no kms:Decrypt. All collected information is resource metadata only (IDs, configurations, tags, relationships). All actions are read-only.
Setup with IAM Role
In Wallarm Console's Add AWS account wizard:
-
Choose authentication method — select IAM role and enter an Account name (any label that identifies this AWS account in Wallarm Console).
-
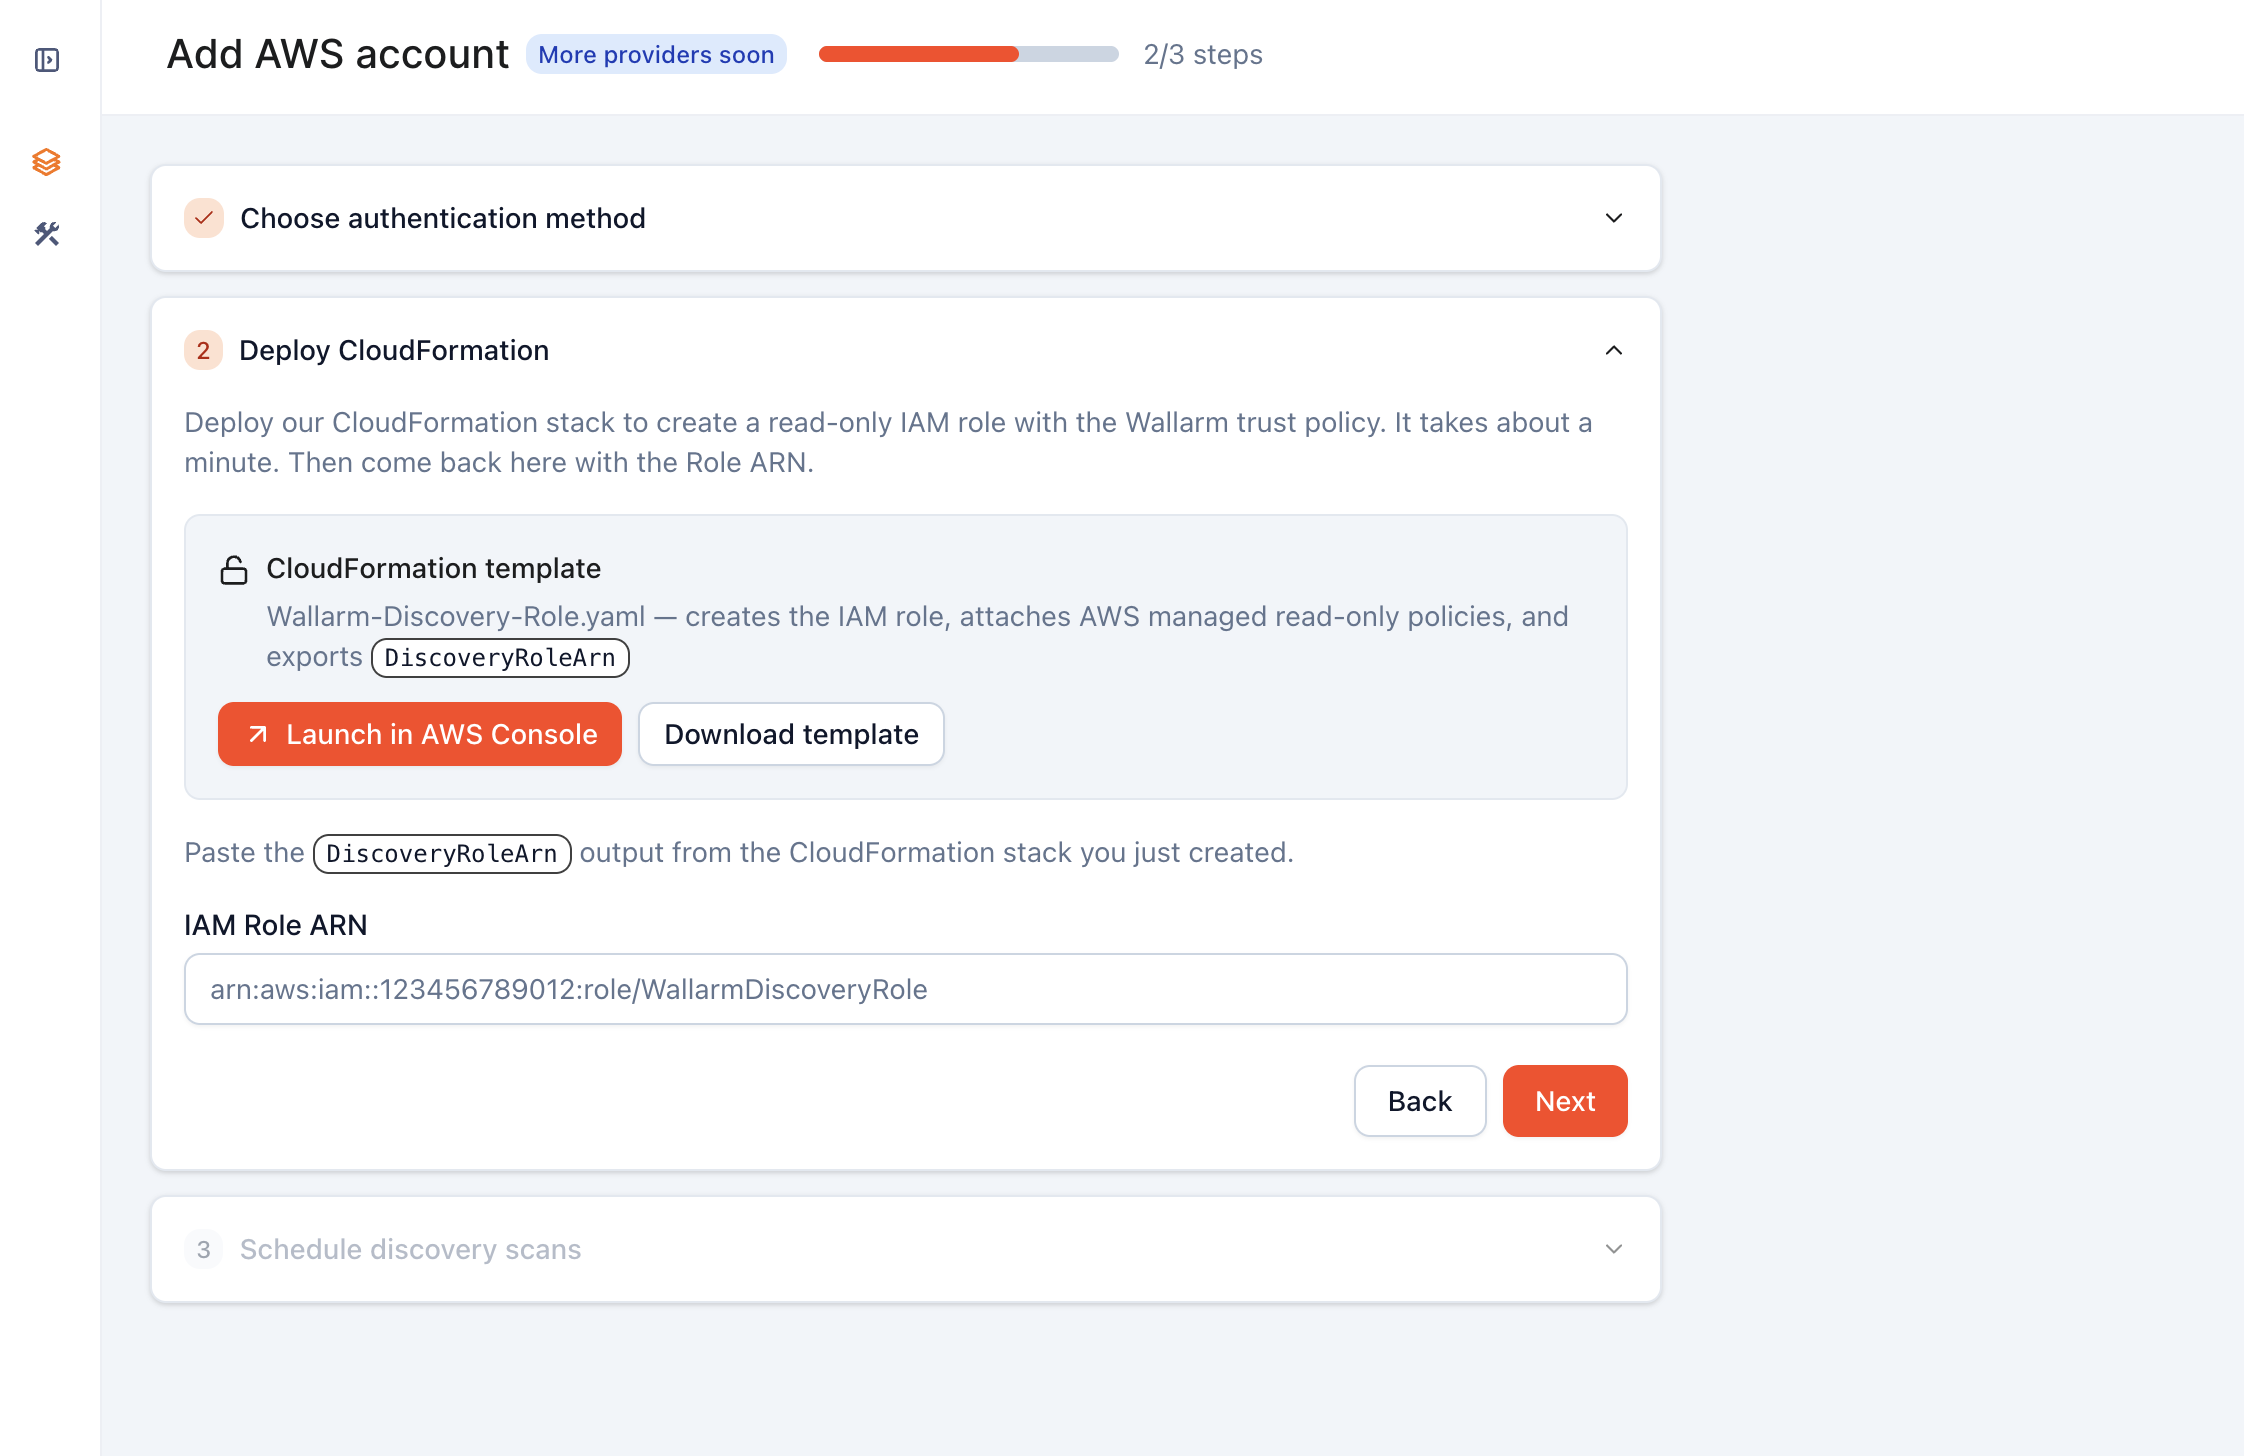
Deploy CloudFormation — use Launch in AWS Console to open AWS CloudFormation with the
Wallarm-Discovery-Role.yamltemplate pre-filled for your Wallarm tenant.Alternatively, use Download template to apply it manually — see the AWS docs on creating a stack on the AWS CloudFormation console.
Stack creation takes about a minute. Once the status is
CREATE_COMPLETE, open the stack in the AWS CloudFormation console, switch to the Outputs tab, copy the value of theDiscoveryRoleArnrow, and paste it into the IAM Role ARN field in Wallarm Console.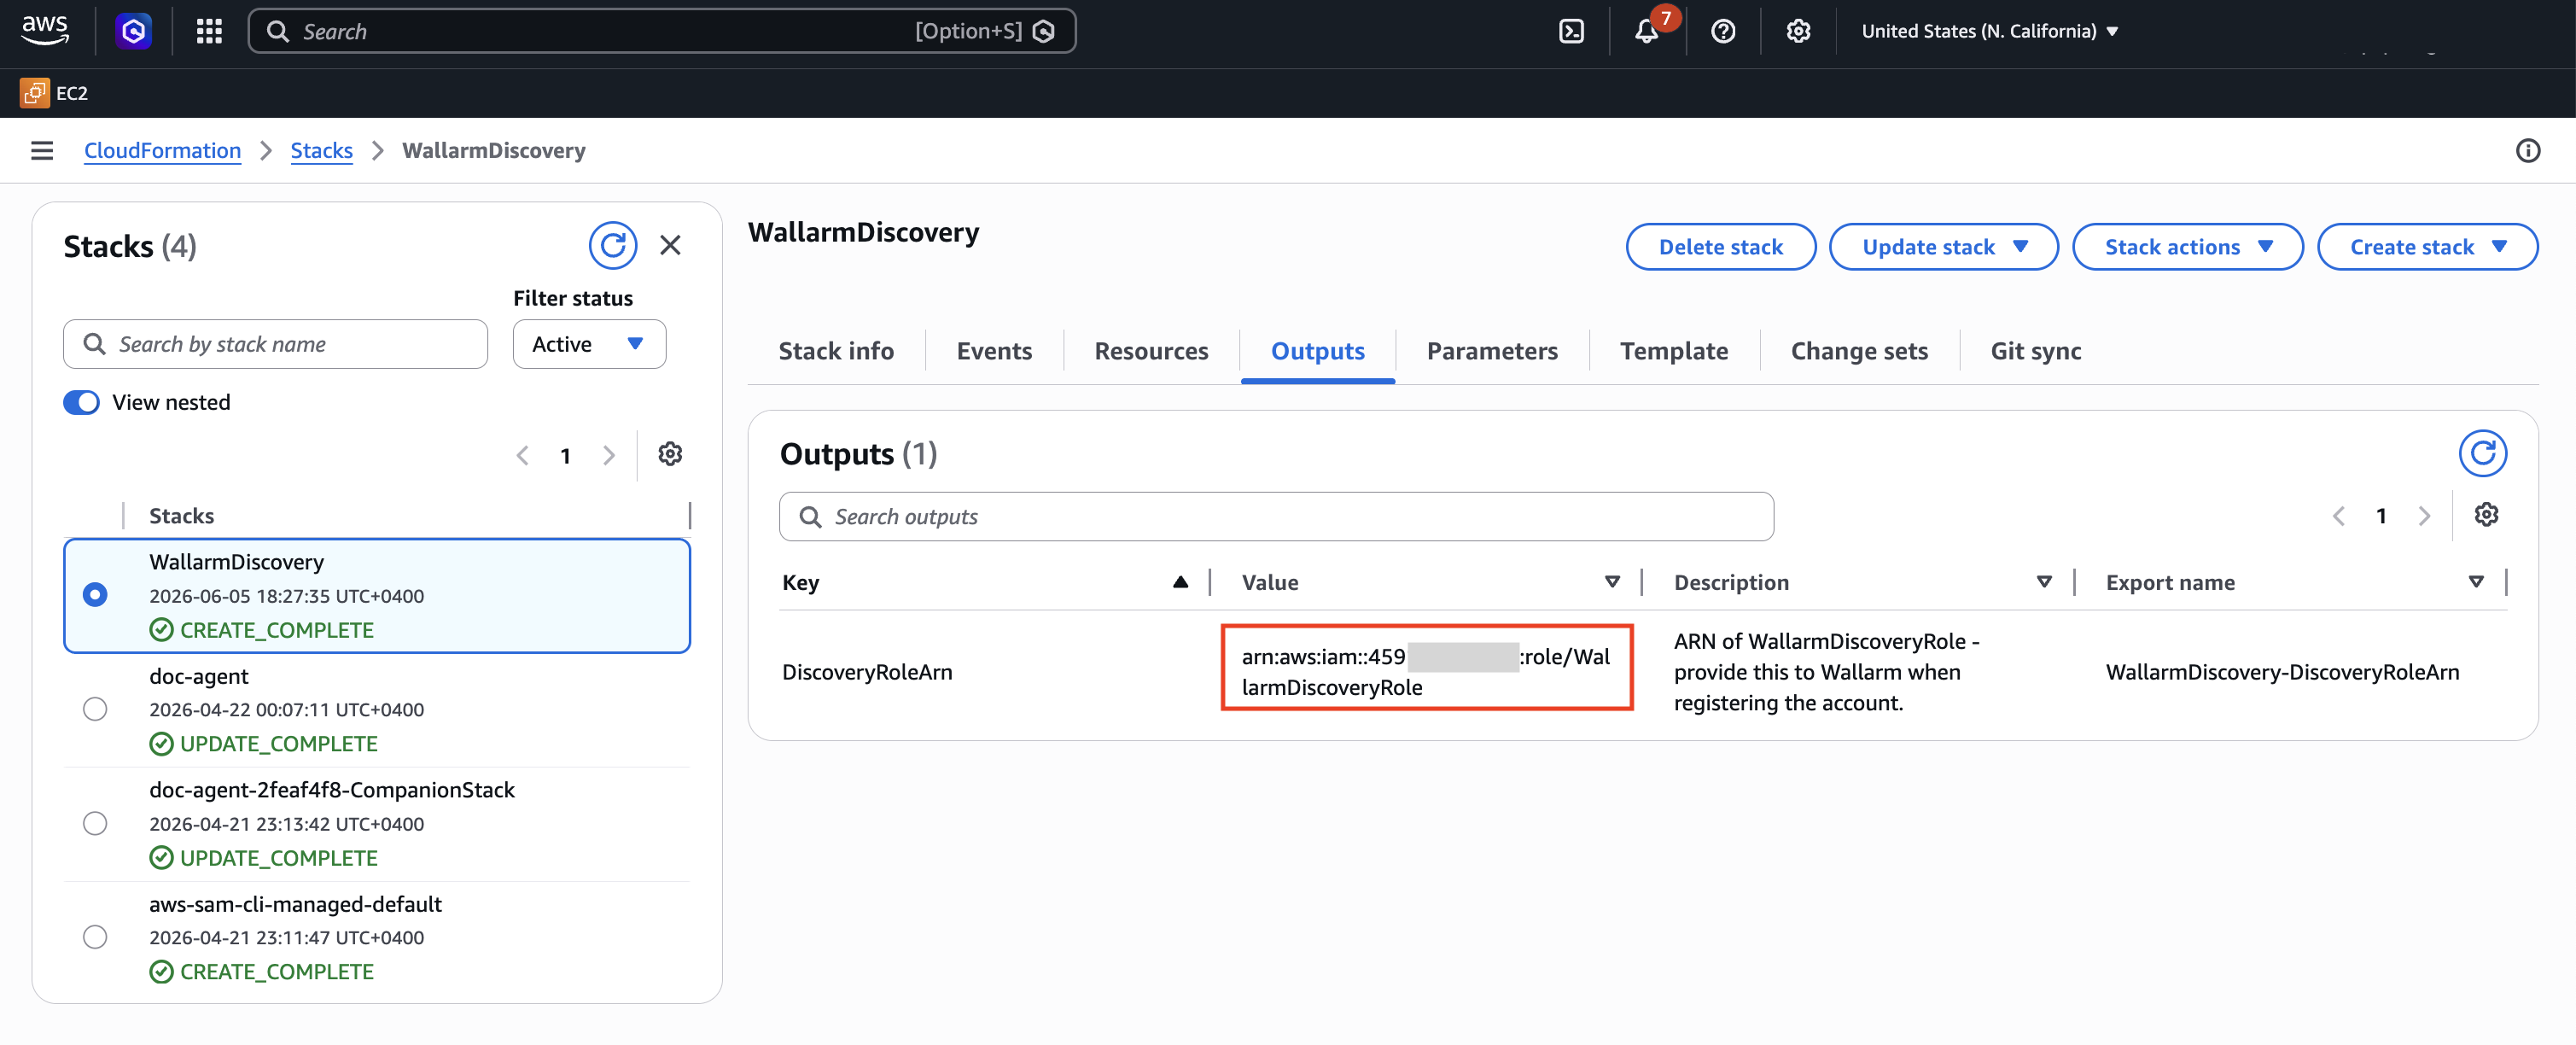
-
Schedule discovery scans — keep Enable scheduled discovery scan on and set the Scan Interval (Minutes).
The template creates the read-only role and a trust policy scoped to your Wallarm tenant, so you do not configure trust settings or an external ID manually.
Setup with Access Key
Before starting the wizard, prepare credentials on the AWS side:
-
Create a customer-managed IAM policy with the required permissions — see AWS docs on creating IAM policies.
-
Create a new IAM user (or reuse an existing one) and attach the policy to it — see creating an IAM user.
-
Generate an access key pair for that user — see managing access keys for IAM users. Store the Access Key ID and Secret Access Key securely; the secret is shown only once at creation time.
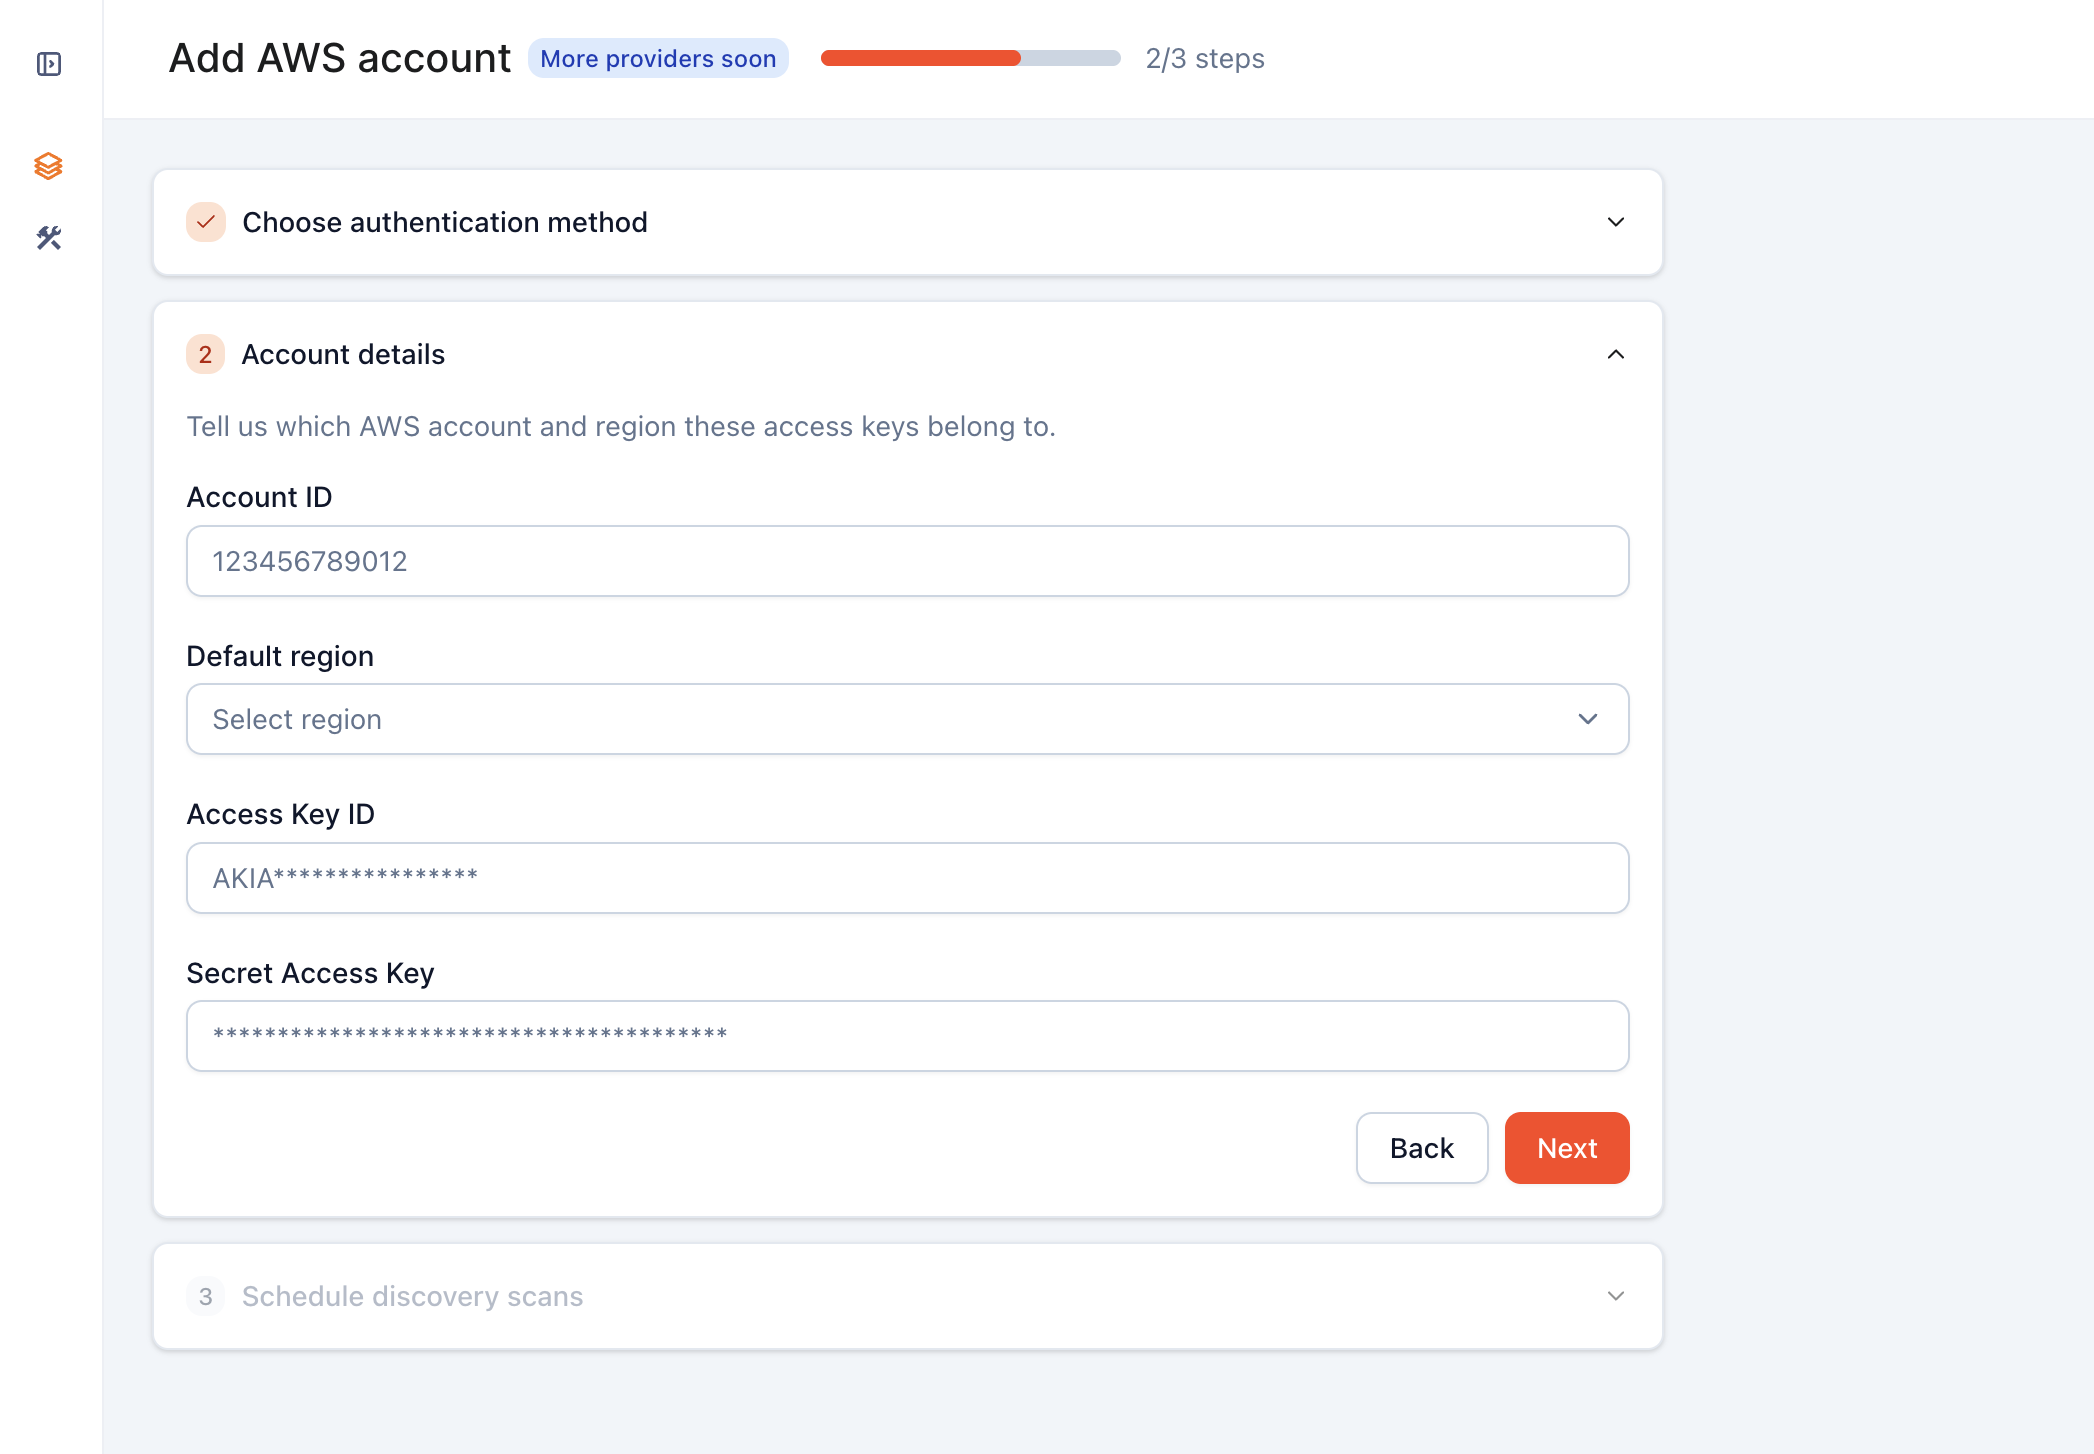
Then in Wallarm Console's Add AWS account wizard:
-
Choose authentication method — select Access Key and enter an Account name (any label that identifies this AWS account in Wallarm Console).
-
Account details — fill in:
- Account ID — your 12-digit AWS account number, visible in the AWS console top-right dropdown or returned by
aws sts get-caller-identity. - Default region — the AWS region code Infrastructure Discovery should scan by default (for example,
us-east-1); see the AWS regions reference. - Access Key ID and Secret Access Key generated in the prerequisite step above.
- Account ID — your 12-digit AWS account number, visible in the AWS console top-right dropdown or returned by
-
Schedule discovery scans — keep Enable scheduled discovery scan on and set the Scan Interval (Minutes).
Settings page
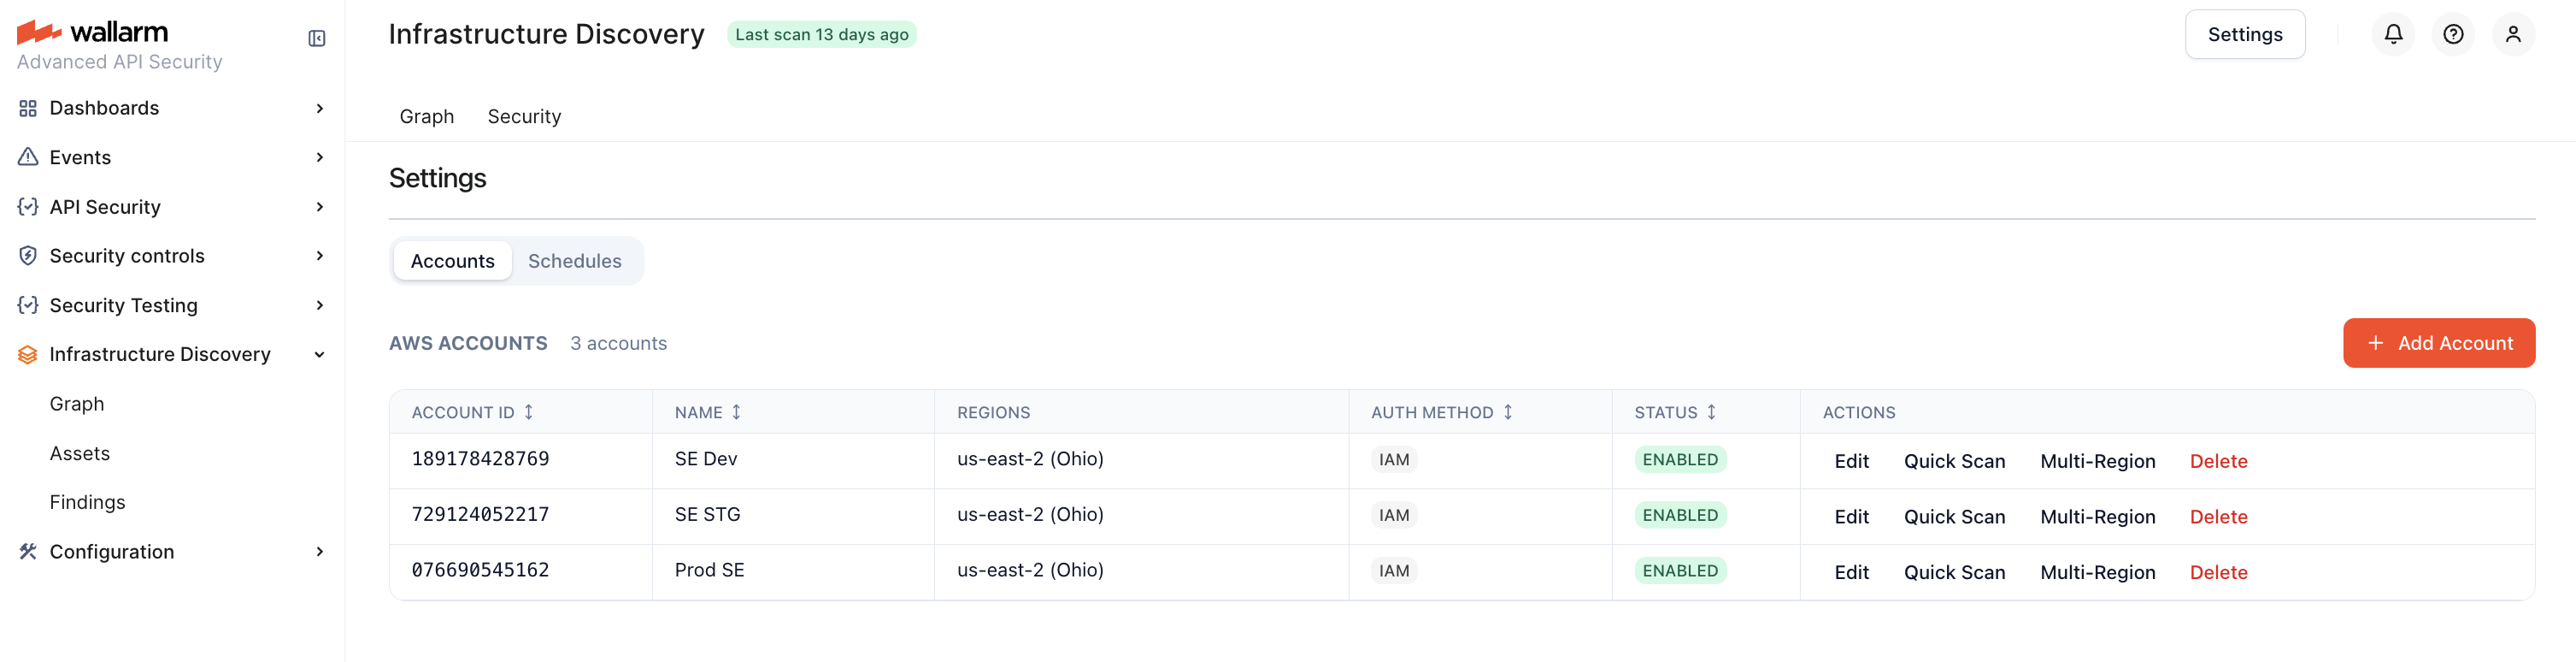
After connecting your accounts, you manage them from Infrastructure Discovery → Settings page.
Accounts
The Accounts tab shows every connected AWS account with per-row actions for editing the account, running a one-off scan, managing scanned regions, and removing the connection.
The Add Account button opens the Add AWS account wizard.
Multi-account setup
Infrastructure Discovery is designed to scan across many AWS accounts from a single Wallarm tenant. Two approaches are available:
-
Connect each account individually — repeat the connection steps for every account. Straightforward for a small number of accounts.
-
Delegate through AWS Organizations — if your accounts are managed by AWS Organizations, you can create a single IAM role in the management account with the
organizations:ListAccountspermission, trusted by your Wallarm tenant (see AWS docs on creating a role for a third-party AWS account). Infrastructure Discovery enumerates member accounts and scans them using the delegated role. This approach scales to hundreds of accounts without manual per-account setup.
Multi-region scanning
By default, Infrastructure Discovery scans a single AWS region per account:
-
IAM Role method — a region auto-detected from your AWS account on first connect.
-
Access Key method — the Default region you entered during setup.
To scan additional regions for an account, open the account on the Accounts tab in Settings and add regions through the multi-region dialog. The dialog is populated from your AWS account, so it lists only regions you have opted into. After you confirm, the new regions are added to the account scope and a scan is triggered for them.
Schedules
Use this tab to set up recurring scans per AWS account and region, and to review the history of scan jobs (each entry links to its logs).
To add a new recurring scan, use Create Schedule and set the Scan Interval (Minutes). The minimum interval depends on your subscription plan — see the AWS Marketplace listing for per-plan limits.
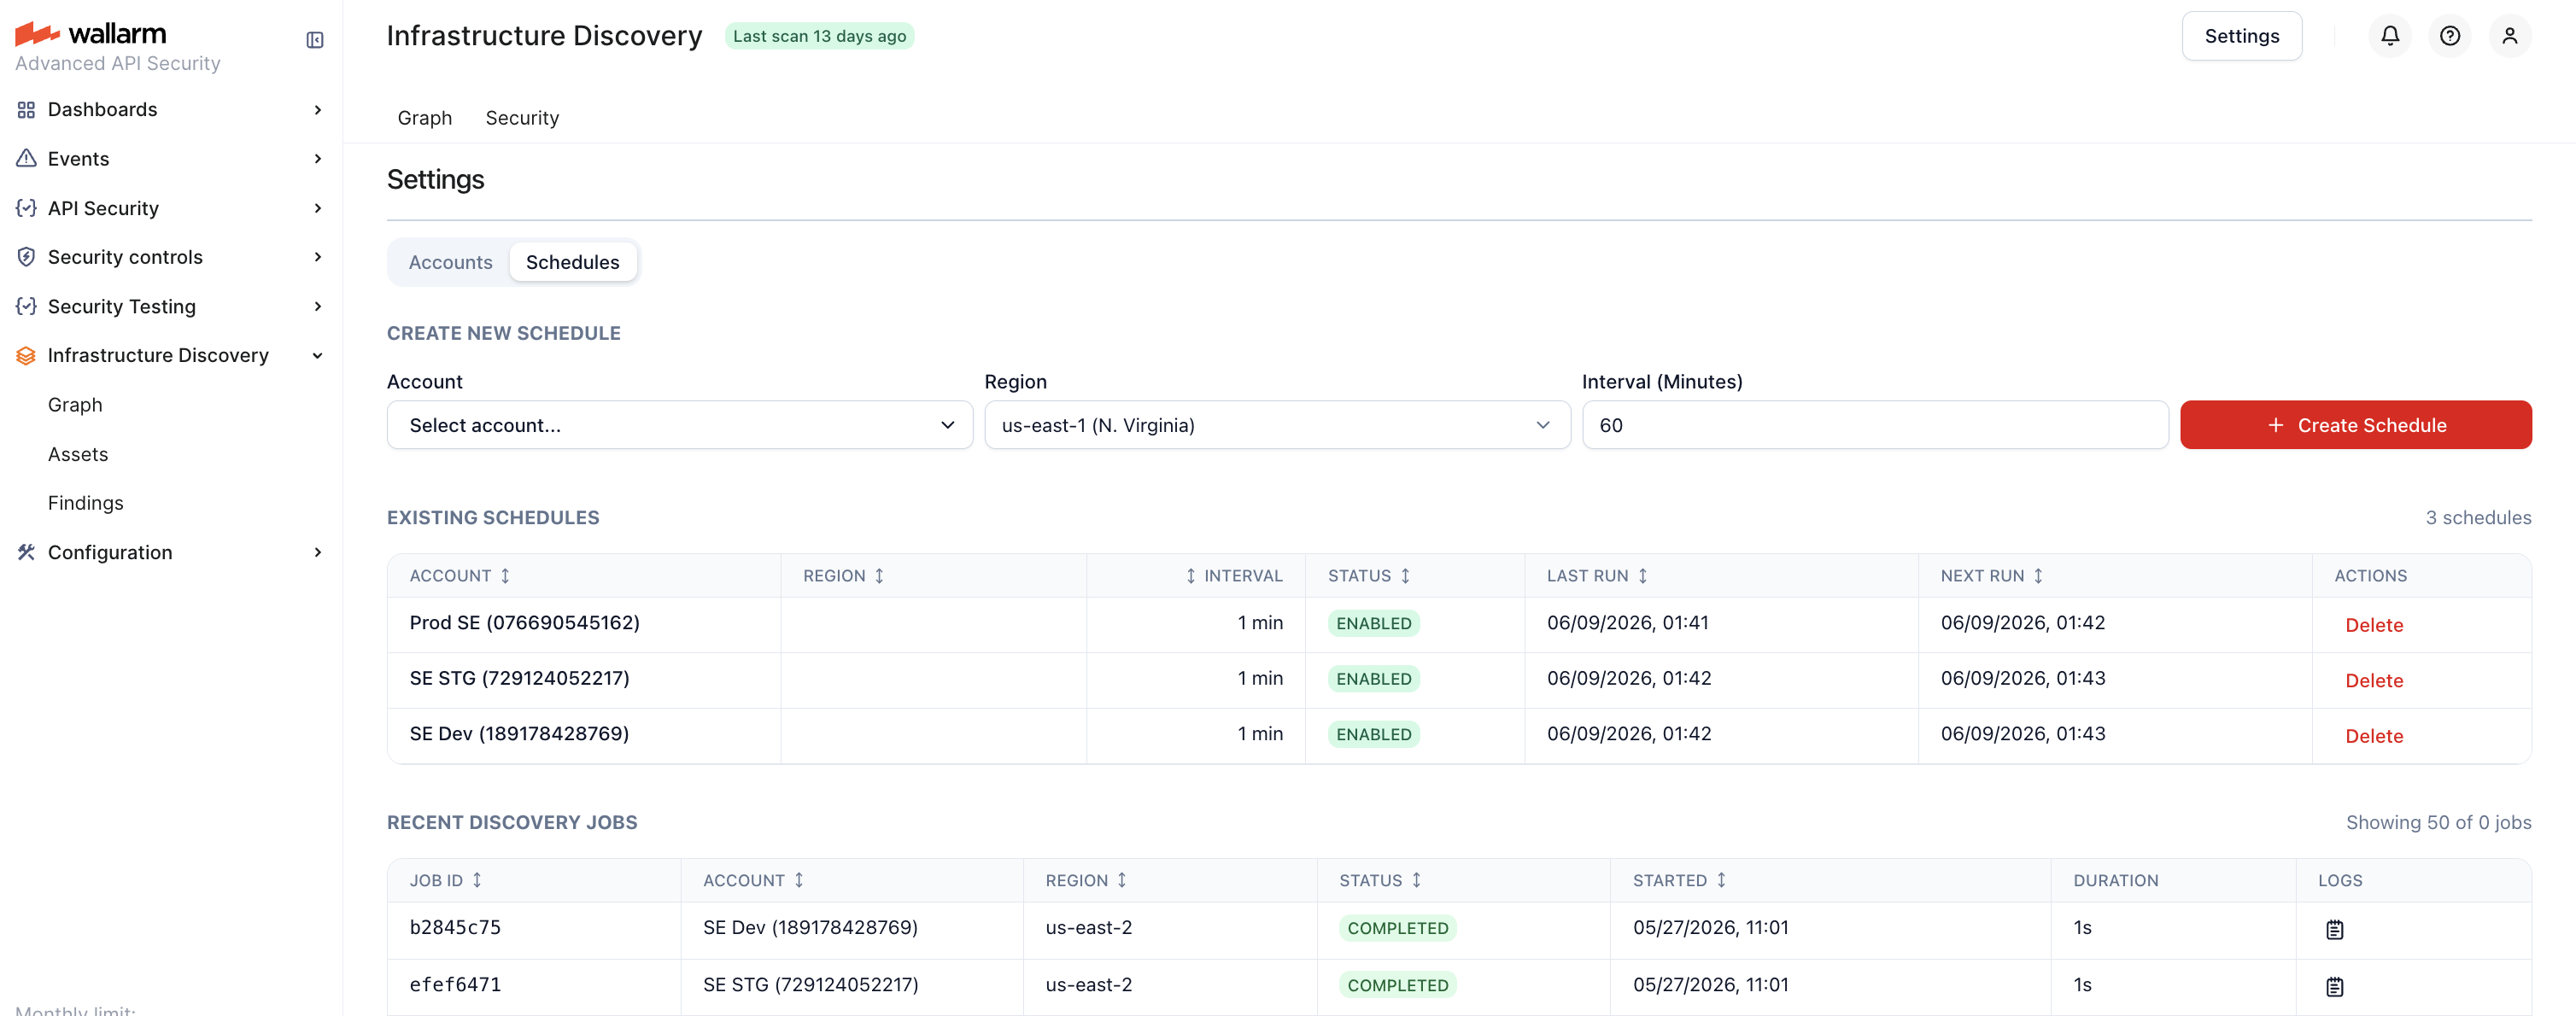
For a one-off scan outside the schedule, use Quick Scan on the Accounts tab.
Subscription limits
Your subscription plan determines:
-
The number of AWS accounts you can connect
-
The number of regions you can scan per account
-
How frequently scans run (see Scan schedule)
Per-plan limits are described in the AWS Marketplace listing. Contact Wallarm Sales if you need limits adjusted for your account.